git hosting은 html을 지원하기때문에 python을 어떻게 호스팅할까 고민했다 .
그중 render를 선택했다.
render접속
개발한 앱을 올리면 자동으로실행해주는 PaaS.
내 컴퓨터에만 돌아가던 코드를 인터넷 주소로 접속 가능하게 만들어준다.
Render | The cloud for builders
Deploy and scale any app or agent from your first user to your billionth. Build faster on intuitive cloud infrastructure for the modern web.
render.com
https://standout.tistory.com/1255
PaaS와 IaaS와 SaaS: 클라우드 컴퓨팅 서비스 모델
PaaS Platform as a Service 클라우드 컴퓨팅 서비스 모델 데이터베이스, 개발 도구, 미들웨어 등을 제공 개발자가 코드 작성에 집중할 수 있게 합니다. 애플리케이션의 부하에 따라 자동으로 확장 또는
standout.tistory.com
create an account
https://dashboard.render.com/register
Cloud Application Hosting for Developers | Render
Render is a unified cloud to build and run all your apps and websites with free SSL, global CDN, private networks and automatic deploys from Git.
dashboard.render.com
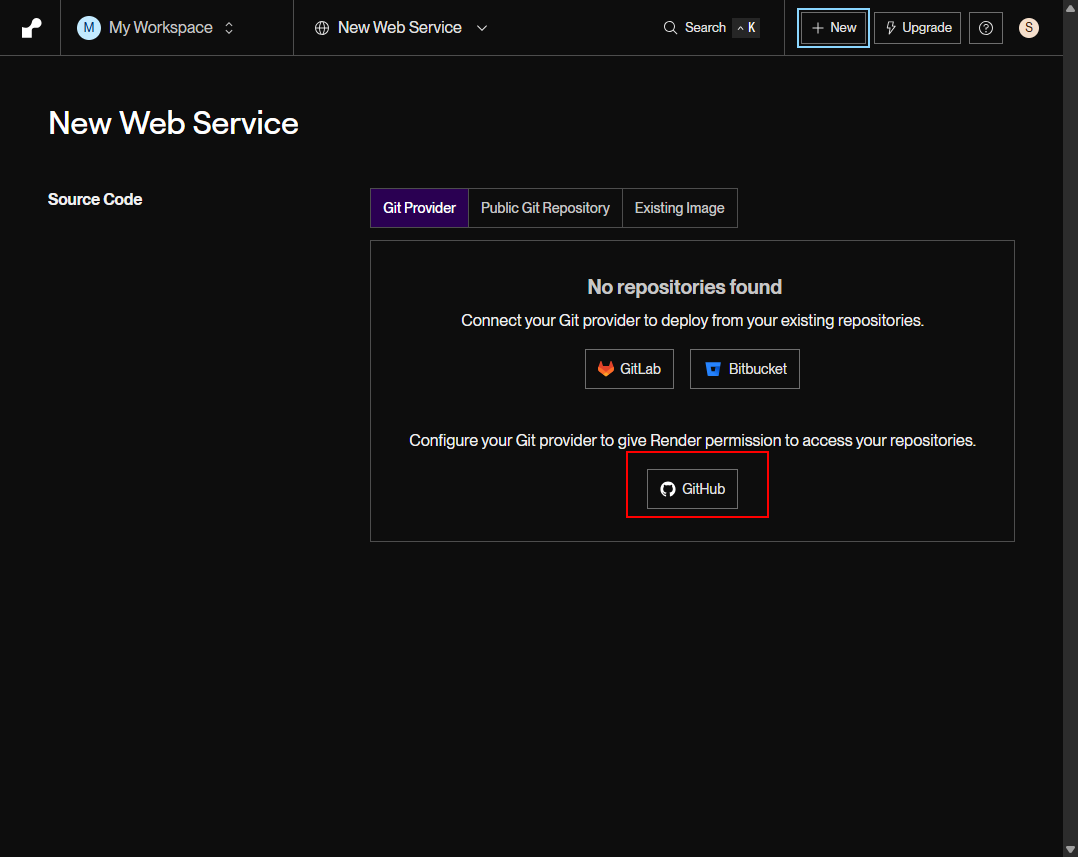
github 계정이 있다면 쉽다 .


new - web service - github 연결 - render install


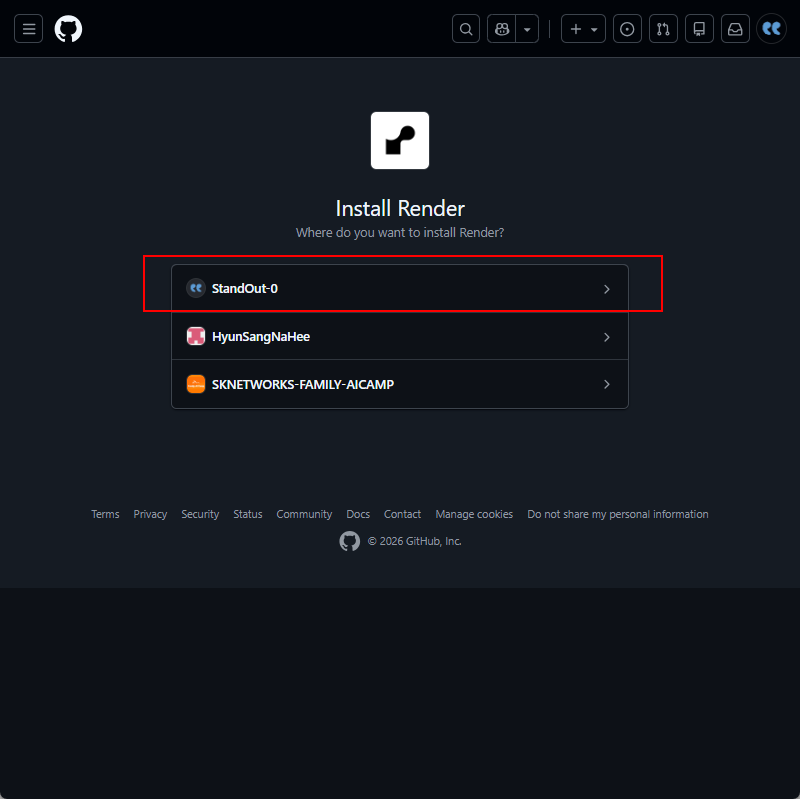

저장소 선택

잠시 저장소로 들어가 어떻게 구현했는지 살펴보자.
root경로에 app.py로, requirements.txt를 작성해놨었다.

Build와 start command 설정
파일이름:app
uvicorn app:app --host 0.0.0.0 --port $PORT
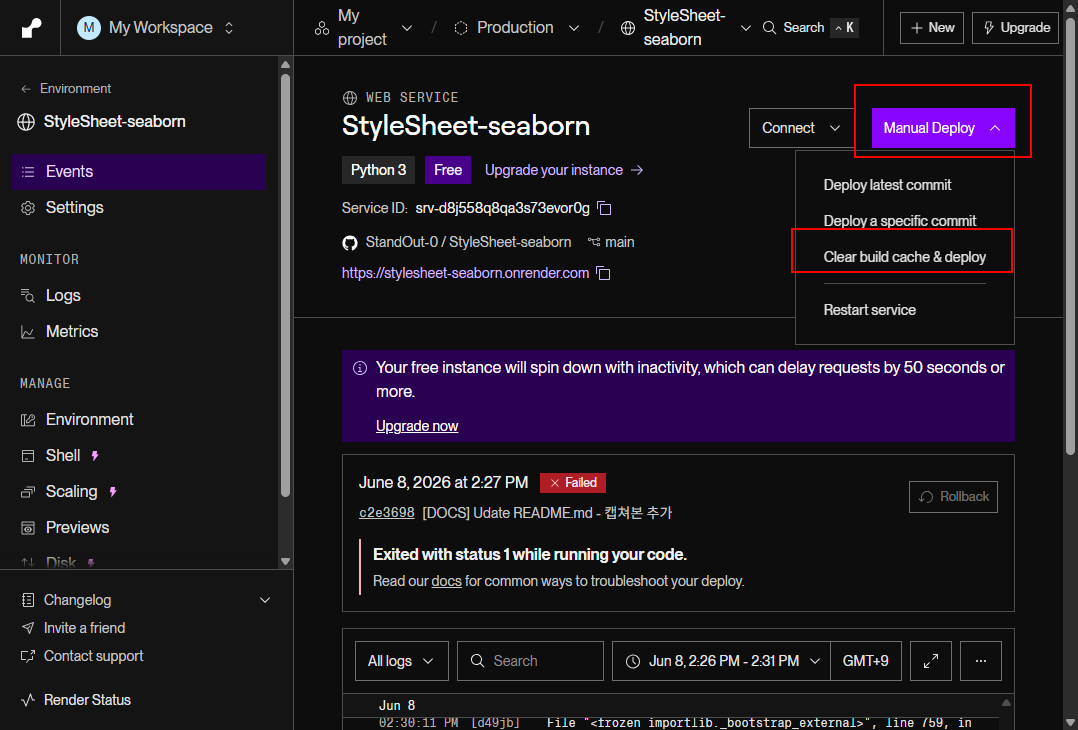
빌드되어 상태값이 live될떄까지 기다려야한다.


만일 failed시 에러를 해결해야한다.

나의 경우 requirements를 수정하고, push한후
streamlit pjt임을 기억해 command 명령도 수정했다.

streamlit run app.py --server.port $PORT --server.address 0.0.0.0
manual deploy - clear build cache & deploy
상태값이 live이면 성공.


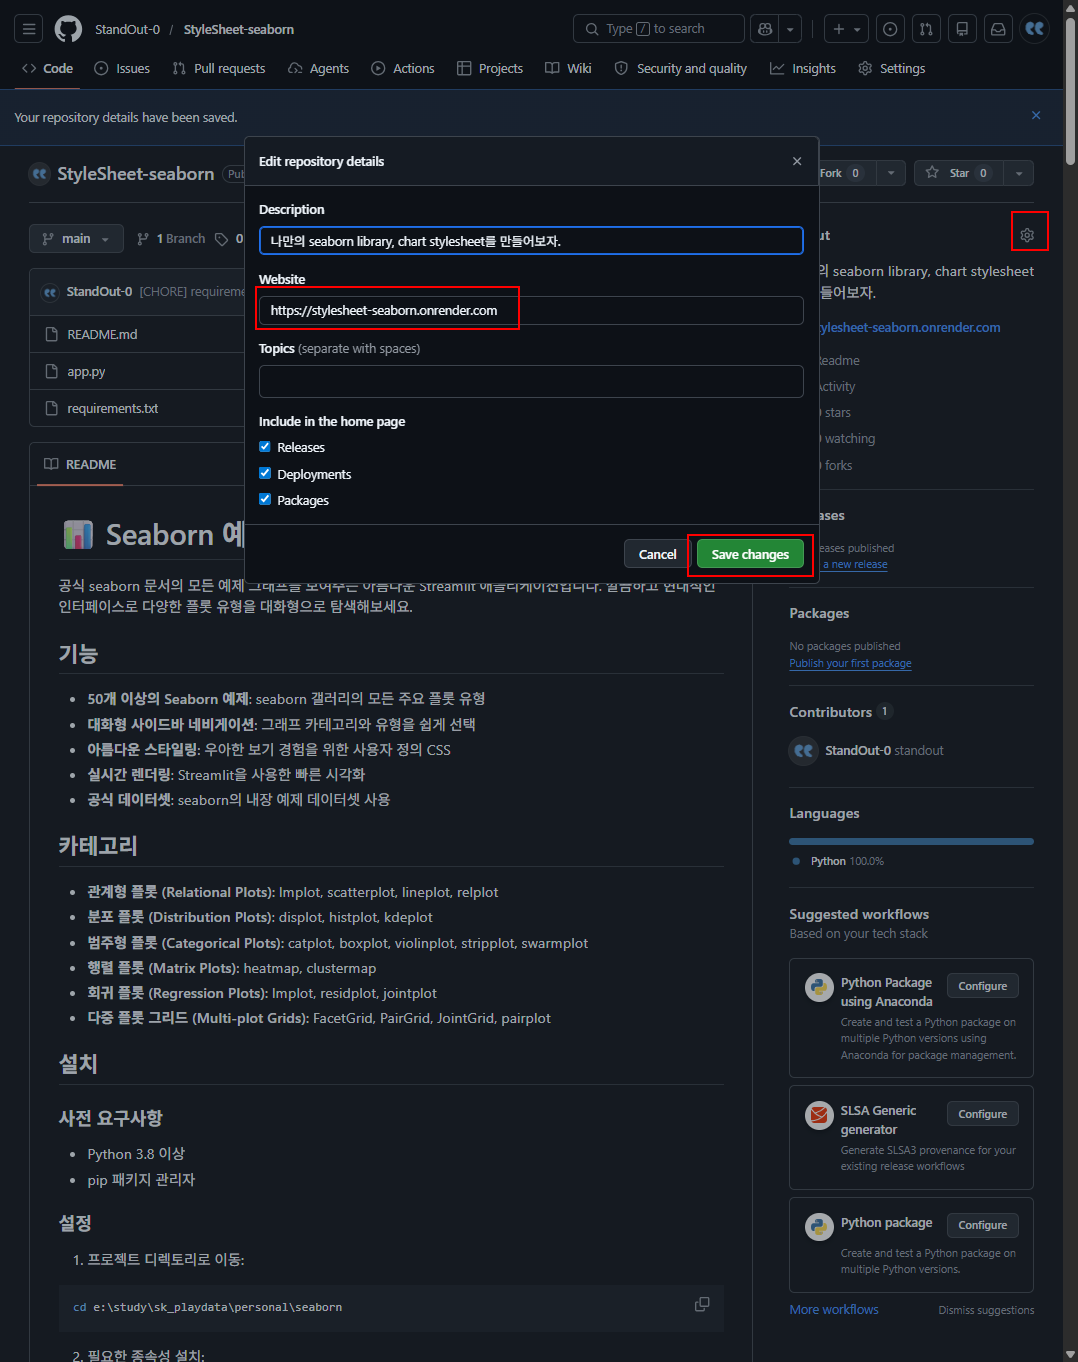
url확인.

git정보에 update할 수 있겠다.

만약 docker 프로젝트라면 별 도의 command 명령어를 작성해놓을 필요가없다.
다만 dockerfiles아래 명령어를 render에 맞게 $PORT 변수를 넣어 변경해놓자.
CMD ["sh", "-c", "streamlit run app.py --server.port=$PORT --server.address=0.0.0.0"]

'Personal > Tip' 카테고리의 다른 글
| Continue, GPT, Claude, Gemini 여러 LLM 사용하기 (feat.ollama모델 연결하기) (0) | 2026.07.01 |
|---|---|
| ollama: 로컬 환경에서 대규모 언어 모델(LLM)을 쉽게 실행할 수 있게 해주는 오픈소스 도구 (0) | 2026.07.01 |
| AI 개발자취업특강 260606 - AI개발자의 일과 현업에서의기준들 (0) | 2026.06.08 |
| 무료 erd 생성 툴 비교하기: dbdiagram.io, ERDCloud, miro, draw.io (1) | 2026.06.02 |
| 2026v. pdf 읽고 설명하는 인공지능 사용후기: 구글 notebooklm, paperpal, chatgpt 비교하기 (0) | 2026.06.02 |


